Showing posts with label mystery quilt. Show all posts

Friday, December 6, 2013

Downton Abbey Block #3 - Mary

Block # 3 Mary

Good news!  This is a nice and easy block and it finishes big, 18 ½”!

Cutting instructions:
               A – HST 6:            cut 7 1/8” strip
Sub cut into 4 -  7 1/8” squares
Then sub cut those in half diagonally
               B – QST 6:            Cut 7 ½” strip
                                             Sub cut into 2 - 7 ½” squares
                                             Then sub cut those in half diagonally both directions
               C – SQ 6:              Cut 6 ½” strip
                                             Sub cut into 6 ½” squares


Time to sew!


I didn’t follow the directions (sorry)!  I started from the center and worked my way out on the block.  I was trying to make certain I kept my points.

I like to take and press the pieces in half and make a crease where the two pieces of fabric are going to be joined.  This makes the two pieces of fabric kind of snuggle up against each other and it helps me in centering my pieces!  J


I’ve creased the two pieces & snuggled them together, pinned them and now I’ll sew them. 


Once I had sewn these on I pressed the seams out and then continued sewing the other sides on.  (Yes, I made both blocks at the same time!)


At this point the block squared up to 8 5/8”.  If yours squares up a little larger or a little smaller that’s okay.  What matters with this block is we want to try to keep our points.


Now do those steps all over again with the next row of material, this time you’ll square up to right about the 12” mark.


I carefully laid all of my triangles out for these next pieces because I knew I would have an issue if the lines on the outside pieces weren’t going in the same direction. 


Sew your triangles together!  Careful though, you are working with a lot of bias seams!!  Don't stretch! :)


Squaring up at this point wasn’t complete squaring up but I got it as square as I could.  What I was trying to accomplish was to make certain that I had a quarter of an inch from the point of the triangle to the end for my seam allowance. 


Next you are going to attach this piece to your block.


I match my two points up and pinned on both side to keep my points together.  When pinning I starting at the center and worked my way out.  Sew opposite sides first, press seams open then sew the other sides.


Square up again, using your points as your reference to cut.


Add your final triangles!  Trim & you are done!  This block is to finish at 18 ½”.  One of mine finished at 18 ¼”, I’ve stuck a pin in the center of that block so when I go to put the quilt together I know that I’ve got to be careful to take this into consideration when sewing with it again.


If you aren't already a part of the Downton Abbey Mystery Quilt Along please feel free to email me at missmarker@rochester.rr.com and I would be happy to add you to the mailing!!

If you have any questions or suggestions PLEASE feel free to either post a response or contact me!  
Happy Quilting Everyone!

Friday, November 29, 2013

Block #2 King's Crown Pre-War

Happy Friday Everyone!  It’s time for Block #2 King’s Crown Pre-War!!

My test Block 2 is complete and the Frixion Pen is now one of the top 10 maybe top 5 notions that I will always have in my sewing room!!  Did you know that Frixion Pens also work great on paper, just iron your piece of paper and your notes disappear!  I found this out when I was working away at this block.  I was making notes on my pattern as to what sizes I should be cutting the pieces and at the same time working away at my test block!  I’m certain this pen saved me 2 ink cartridges and at least 3 trees today!

Why you may ask did this pen become my best friend when making this block?  Because my life lesson of the day is: pattern designers spend hours going over patterns, making certain everything is perfect so that when you go to put your block together it fits.  Designers test patterns at least twice (many times more than twice) plus they are normally put together by pattern testers to make certain they are correct and easily understood.  In the end, we are all human and humans make mistakes so next time I read a pattern and I know in my gut that something just isn’t right I’m going to sit down immediately with my calculator and double check the pattern numbers and I’m NOT going to spend 2 hours trying to make something work that mathematically wont. 

On to block #2!  It’s beautiful!  I love it! 
Here’s your strip cutting directions:
  • ·        Piece A 2” strip sub cut into 2” squares, you need 4 for each block
  • ·     Piece B 5 ¼” strip sub cut in 5 ¼” squares (we are going to make 8 ½ square triangles at once!) you will need 1 square of each fabric for each block. (Note: you will be cutting this block from 2 different fabrics.)
  • ·        Piece B 2 ¾” strip sub cut into 2 ¾” squares (you need 4 squares for each block), then cut diagonally
  • ·        Piece C 3 ¼” strip sub cut into 3 ¼” squares (you need 2 square for each block), then cut diagonally
  • ·        Piece D 4 ¼” strip sub cut into 4 ¼” squares (you need 2 squares for each block), then cut diagonally
  • ·        Piece E 4 ¾” strip sub cut into 4 ¾” square (you need 1 square for each block)

Let’s make the half square triangles first!
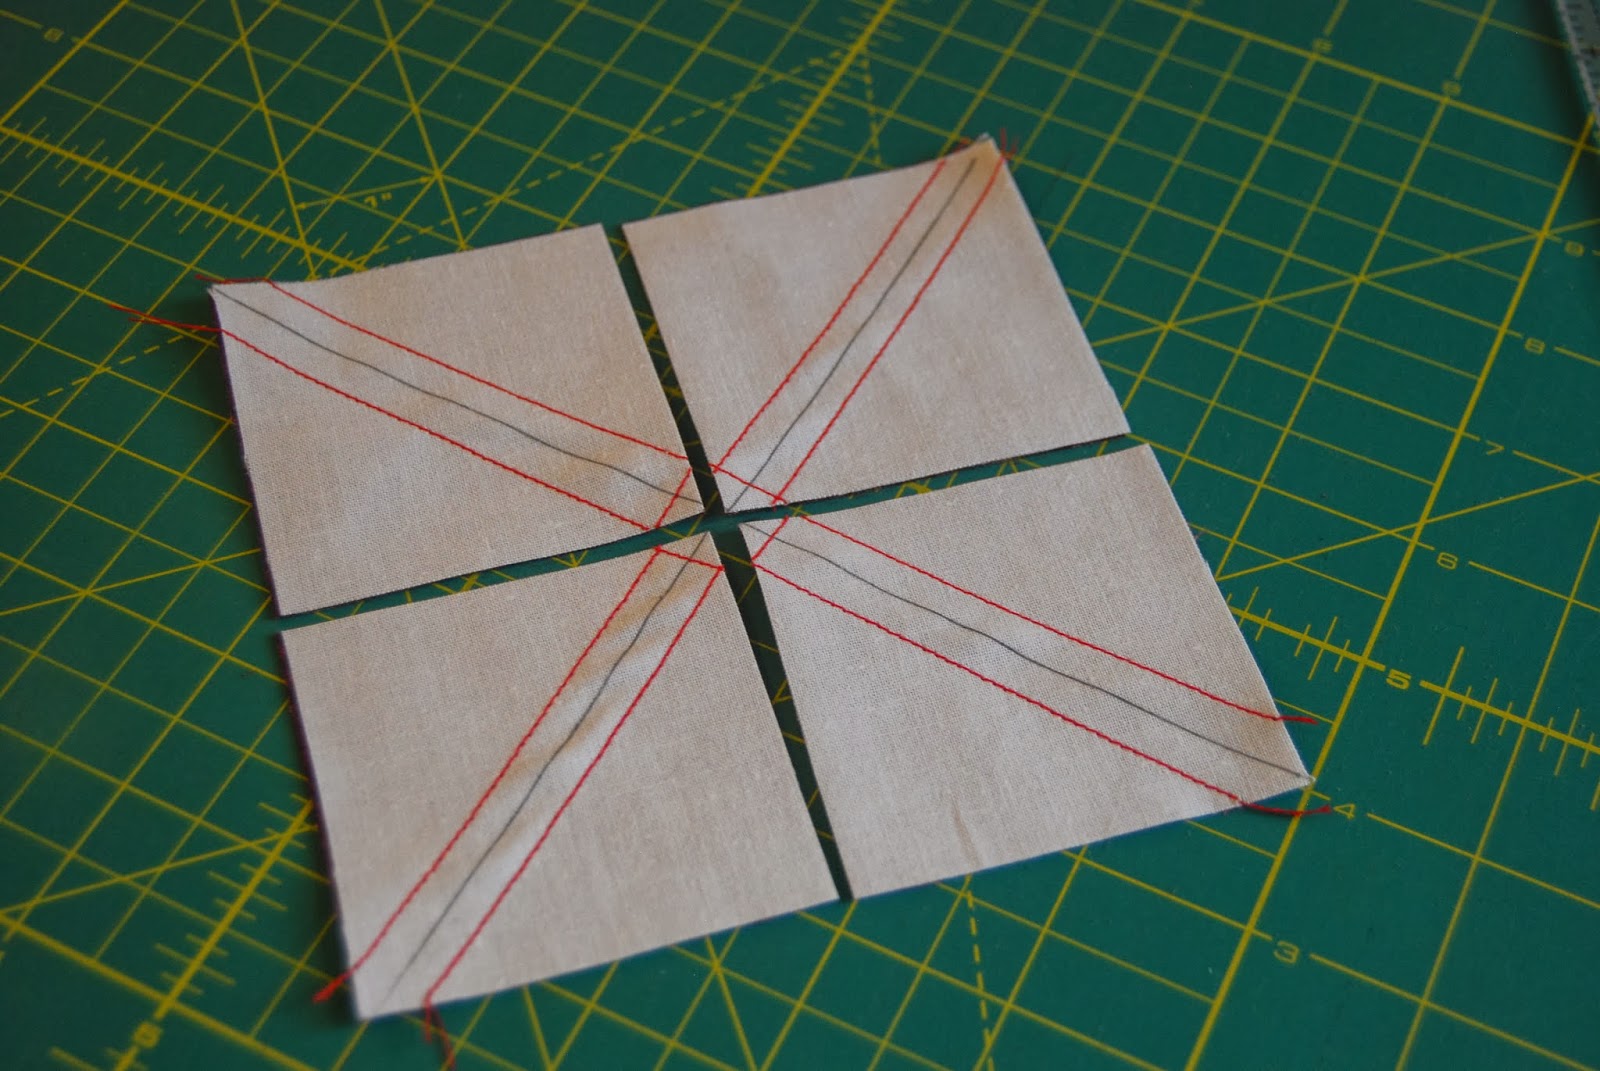
Take your two 5 ¼” blocks and set them rights sides together and draw a line diagonally:

Next sew a ¼” seam using your drawn lines as guides.  I’ve sewn mine in Red thread so that it is easy to see:


Now comes the fun!  Start cutting these little babies apart!

Cut your 5 ¼” block in half (2 5/8”) horizontally

Then do it again. 

Now it’s time to cut these the way we’ve all been doing it for years!  Time to cut on your drawn lines.


Take them over to your ironing board, set your seams and then press them open to the dark!
These square up to 2”! 

Next step is to assemble your flying geese.  First off, I need to get my disclaimer out there!  Flying geese aren’t my favorite.  I do however like them when I use Eleanor Burn’s Flying Geese Ruler but I figured everyone may not have one so I’d better do them the somewhat old fashioned way so here we go!  Because this block isn’t my favorite I know I have to make mine a little larger than normal so that I have plenty of room to square them up.  It bugs me when I cut off one of my points so I’ve learned over the years to make mine bigger so when I square them up I’ve got a nice ¼” at the top and sides of my Geese.
This block is made from your 3 ¼” triangles and your 2 ¾” triangles.


Remember I said I like mine a little bigger so that I can square them up!


Sew your triangles to your triangle (1/4” seams) and press to the dark side.  Next, we’ll trim these up so that they look beautiful!


Remember your want your center point to be centered so that’s where I start, I find my center!  This block will be 3 ½” x  2”.  I line my ruler up with the 1 3/4” mark right on the point of my block checking to make certain that my ruler is pretty straight and I cut the right side.


I then flip my block over and trim off the other side, check to make certain that my block is now
3 ½” long.


Square up the top so you have a ¼” seam allowance


Then square up your bottom!  Your block should measure 3 ½” x 2”


Time to put your side borders together

And your top and bottom!


Time to make the center!!


Attach your 4 ¼” triangles to your 4 ¾” squares.  Again, my triangles are larger so that I can square up my points once the block is together.


Attach all four of your triangles to your block pressing the seams towards the triangles.


Square up your block!


Attach your side borders being careful to match up your centers.  I pin the center first then work my way out.


 Attach your top borders! 
Your block is done!!!!


The first color way you will need to make 8 blocks, the second color way calls for 4 blocks.  I’m going to make all of the half square triangles first then make all of my flying geese for all blocks then put all of them together at once.  This week is a little challenging but the good news is next week’s isn’t so if you don’t get all of them done this week you will have some time to catch up next week!

Happy Quilting!!!

Margaret

If you would like to participate in this mystery quilt please email me at missmarker@rochester.rr.com and ask to be added to the list!

Hope everyone had a wonderful holiday!

Friday, November 15, 2013

Mystery Quilt With Downton Abbey Fabric

I have a major announcement that I can FINALLY tell all of you!  Starting this Friday and continuing every Friday until the project is complete I'm going to walk you through each step of making your very own Downton Abbey quilt!

Do you have your fabric?  If you don't have it yet you need to get to your local quilt shop that is caring this line and decide if you will be sewing with the Dowager Dutches, Lady Mary, Lady Edith or Lady Sybil!  If you live in my area I know for a fact that O'Susannah's Quilts & Gifts has it!

Here's a snapshot of each fabric so that you can start trying to make your decision!  It's hard to decide so grab a cup of coffee, tea or a glass of wine and sit back and enjoy these beyond beautiful fabrics!


Hard to pick out a favorite isn't it?  I had a really difficult time deciding if I was going to go with the Dowager Dutches, Lady Mary, Lady Edith or Lady Sybil!  I stood gazing lovingly at the fabric line and struggled to make the decision.  I LOVE the Dowager's line it is beyond beautiful and Lady Mary's is elegant, Lady Edith's is a true reflection of her character and Lady Sybil's is as beautiful as her character!

So in the end, after allowing my hands to gently 'pet' each and every bold in the line it was the Lady Sybil line that is now lovingly laying on my cutting table just waiting for the first block instructions!!!!


Beautiful isn't it?


Part of me doesn't want to cut into it at all and the other part can't wait to see it done in a quilt!


I am so excited about this project!

So if you don't have your fabric yet it's time to go and get it!  If you need the fabric requirements let me know which line you want and I can send you the requirements or stop into your local shop that has the line of fabric and get ready to start sewing!!  

The first block will be revealed one week from today!!

Happy Quilting!

Margaret