Showing posts with label Downton. Show all posts

Friday, December 13, 2013

Downton Abbey Block #4 - Castle Garden

Time to start sewing!

I like to lay everything out that I’m sewing so that I can make certain I’m sewing it together correctly.


First step was to sew the triangles on each side of the square.  Once they are sewn square up your triangle using the corner of the square as your guide to give you a ¼” seam allowance at the point. 


Next attach your triangle to create a 6 ½” square.  Set these aside.


Next we are going to make 4 flying geese units.
I start by laying my next block sections out.


Attach the outer triangles trimming each section as you go giving a ¼” beyond your intersecting points.


Once those are attached attach your next triangle.


Don’t forget to clip the ‘rabbit ears’ and trim your blocks.


Square this up again by using the your ‘points’ to create your ¼”.  In the above photo I used where the black met the cream background fabric and the straight lines on my ruler.
I also used the points on my triangles as a second reference mark when squaring up each step.


Attach your next triangle


Attaching more triangles!


This squares up to 6 ½” x 12 ½”.

Next step is to make your center block.  Again I start by laying it out.


Make your flying geese first and then sew your center row.


The flying geese were 3 ½” x 6 ½”, once attached to the center block they were 12 ½” x 6 ½”.
I forgot to take pictures of the top & bottom rows!  Those rows square up to 3 ½” x 12 ½”.

Sew your three rows together.


Your finished block is 24 ½” and you are only making one!!!

Check out Miss Marker’s Quilts at:

My most recent tutorials at www.youtube.com Miss Markers Quilts or Margaret Leuwen
www.facebook.com Miss Marker’s Quilts

Happy Quilting!!

Friday, December 6, 2013

Downton Abbey Block #3 - Mary

Block # 3 Mary

Good news!  This is a nice and easy block and it finishes big, 18 ½”!

Cutting instructions:
               A – HST 6:            cut 7 1/8” strip
Sub cut into 4 -  7 1/8” squares
Then sub cut those in half diagonally
               B – QST 6:            Cut 7 ½” strip
                                             Sub cut into 2 - 7 ½” squares
                                             Then sub cut those in half diagonally both directions
               C – SQ 6:              Cut 6 ½” strip
                                             Sub cut into 6 ½” squares


Time to sew!


I didn’t follow the directions (sorry)!  I started from the center and worked my way out on the block.  I was trying to make certain I kept my points.

I like to take and press the pieces in half and make a crease where the two pieces of fabric are going to be joined.  This makes the two pieces of fabric kind of snuggle up against each other and it helps me in centering my pieces!  J


I’ve creased the two pieces & snuggled them together, pinned them and now I’ll sew them. 


Once I had sewn these on I pressed the seams out and then continued sewing the other sides on.  (Yes, I made both blocks at the same time!)


At this point the block squared up to 8 5/8”.  If yours squares up a little larger or a little smaller that’s okay.  What matters with this block is we want to try to keep our points.


Now do those steps all over again with the next row of material, this time you’ll square up to right about the 12” mark.


I carefully laid all of my triangles out for these next pieces because I knew I would have an issue if the lines on the outside pieces weren’t going in the same direction. 


Sew your triangles together!  Careful though, you are working with a lot of bias seams!!  Don't stretch! :)


Squaring up at this point wasn’t complete squaring up but I got it as square as I could.  What I was trying to accomplish was to make certain that I had a quarter of an inch from the point of the triangle to the end for my seam allowance. 


Next you are going to attach this piece to your block.


I match my two points up and pinned on both side to keep my points together.  When pinning I starting at the center and worked my way out.  Sew opposite sides first, press seams open then sew the other sides.


Square up again, using your points as your reference to cut.


Add your final triangles!  Trim & you are done!  This block is to finish at 18 ½”.  One of mine finished at 18 ¼”, I’ve stuck a pin in the center of that block so when I go to put the quilt together I know that I’ve got to be careful to take this into consideration when sewing with it again.


If you aren't already a part of the Downton Abbey Mystery Quilt Along please feel free to email me at missmarker@rochester.rr.com and I would be happy to add you to the mailing!!

If you have any questions or suggestions PLEASE feel free to either post a response or contact me!  
Happy Quilting Everyone!

Wednesday, November 6, 2013

Yoko Saito Quilts

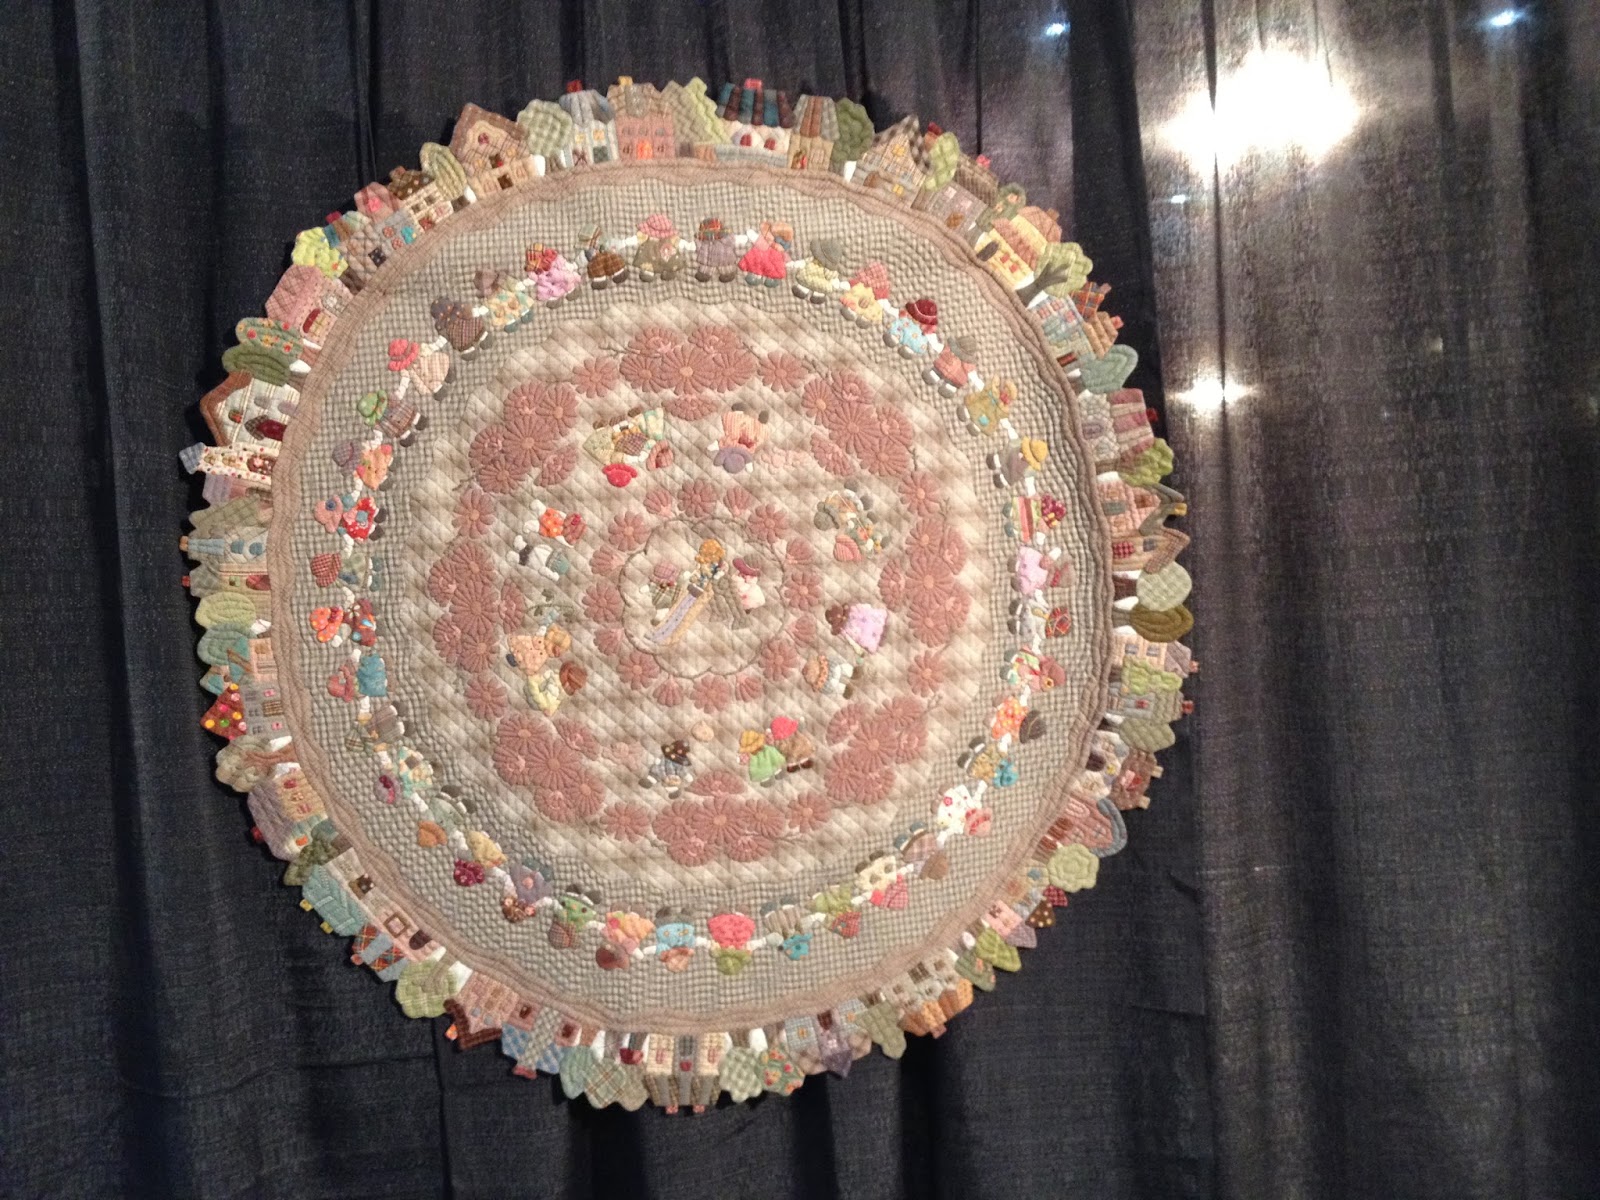
As many of you already know I was lucky enough to go to Quilt Market in Houston Texas last month and while there I was able to spend a few minutes looking at some of the amazing quilts at Quilt Festival.  One of the quilt designers that really caught my eye was Yoko Saito!  Yoko's quilts are amazing!  I was able to get pictures of them to share with you!

I wish I had my good camera with me :(!  My iPhone was all I had!

Gorgeous!


I really do love Sun Bonnet Sue's!  Here's Yoko's


And here's Betty Alderman's!


All those little houses that make up the border were amazing!


Another beauty!

If you ever get a chance to see her quilts please do go!  They are beyond stunning!

Happy Quilting!  Don't forget to 'Follow" me and check back soon for some Downton Abbey Pictures!!

Margaret